Seat Map Management
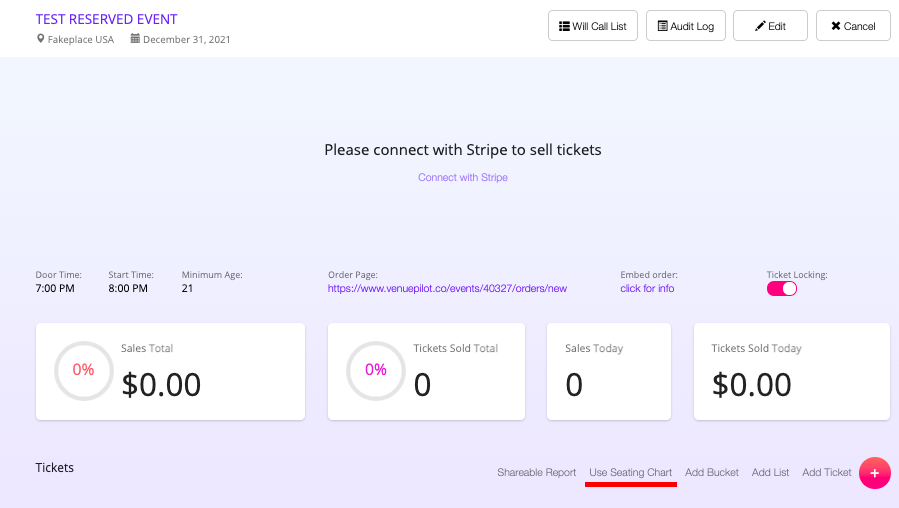
When creating an event that requires reserved seating or advanced inventory options (pods, etc), select Use Seating Chart from your event’s dashboard:
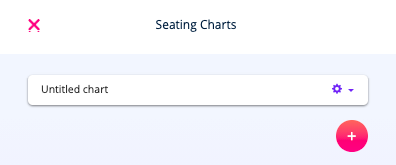
Here you will be able to select an existing seating template or create a new one from scratch (select the “+” icon):
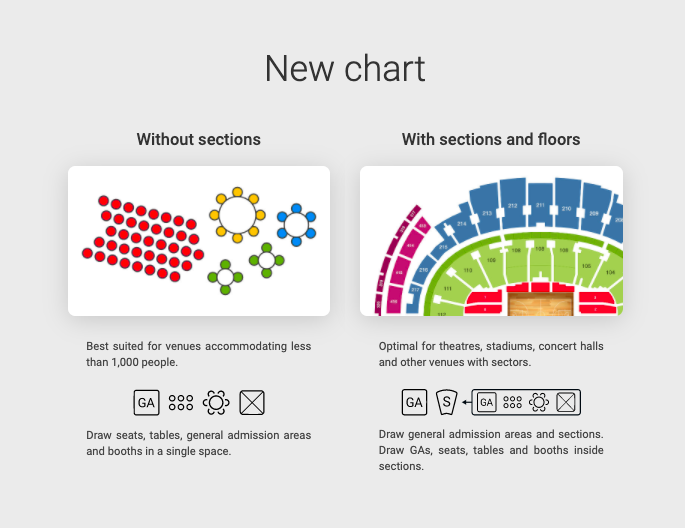
Select the option that fits closest to your desired floor plan.
Next, if you can, upload a reference image (if applicable) that can be used to trace over.

Here you can follow the tool tips to build your floor plan from scratch. See below for a seat map builder tool guide:
- Focal Point: Use this tool to set the focal point of your floor plan (ex: stage up/stage down). This will determine which seats are sold as best available first
- Row Tool: Use this tool when building out reserved row seating
- *Round Table Tool: To create table seating, use this tool to create circular or rectangular shaped tables
- Booth Tool: Use this tool to create booths (VIP, merch, or sound booths, etc)
- GA section: Use this tool to create general admission sections (GA floor, etc)
- Shape Tool: Use this tool to create other shapes/elements for your seat map (ex: stages, barricades, etc)
- Text Tool: Use this tool to label shapes or sections of your floor plan with text
- Image Tool: Use this tool to add an image to your floor plan (logo, sponsor info, etc)
- Icon Tool: Use this tool to drop in a generic icon (ex: restroom symbols, etc)
*IF you are using bookable as a whole and want the ‘table’ price to show, all tables in that ‘category’ need to have the same number of seats
*IF you are using bookable as a whole and the tables have different quantities of seats in the same category, it will show the PER SEAT price.

When creating your seat map, be sure to follow the prompts to label your sections, set your seat selling order, and paint your section with a category (i.e price level).

Once you are done creating your floor plan, check to ensure you have no errors or duplicate sections.
Here you will see all of your sections that were created correctly highlighted in green, and any potential errors highlighted in red:

Here you will see you have created 1 duplicate object which you will want to adjust before going live.

Once you have reviewed your seat map, save your work and select your seat map.
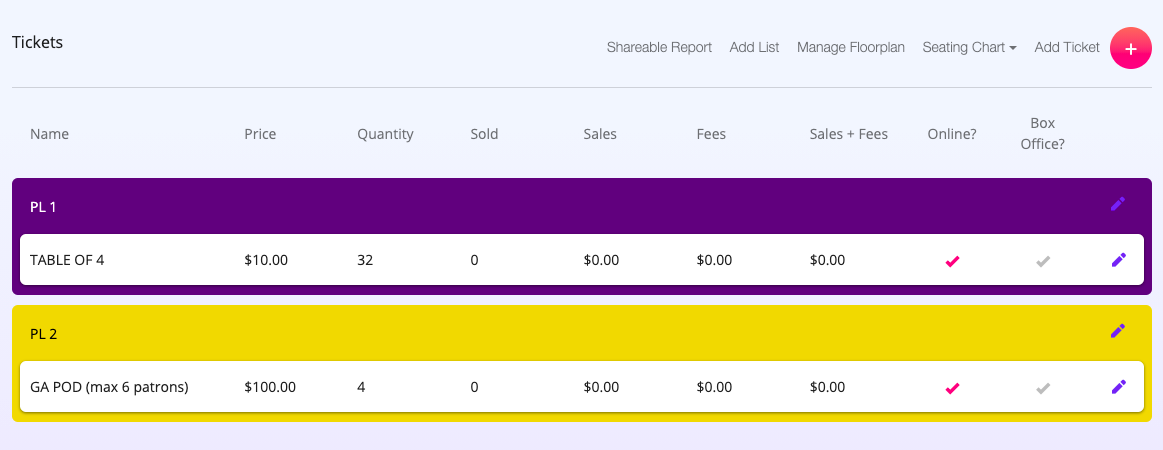
Based on the categories you created in your seat map, we will get you started with template ticket types. Go into each price level and adjust your pricing, on-sale details, etc. before going live.